Working…
Workflow Walkthroughs

PROTAC Builder Case Studies

These are workflow case studies, not claims of experimentally validated degradation outcomes by the web app alone. Each one shows a practical path through the PROTAC Builder ecosystem so users can see where to start, which upstream tool to use, what information to collect, and how to move into assembly and downstream modeling.

The goal is to make tool fit clearer. Some users begin with a target-bound warhead, some begin with recruiter selection, some begin with a viral protein-ligand structure, and some move quickly into API or batch workflows. In every case, assembled candidates should still be treated as design hypotheses that require validation.

Workflow examples Component-first design Builder handoff Validation still required
Overview graphic showing computational PROTAC workflows from candidate setup through geometric review, ternary modeling, learned scoring, and prioritization.
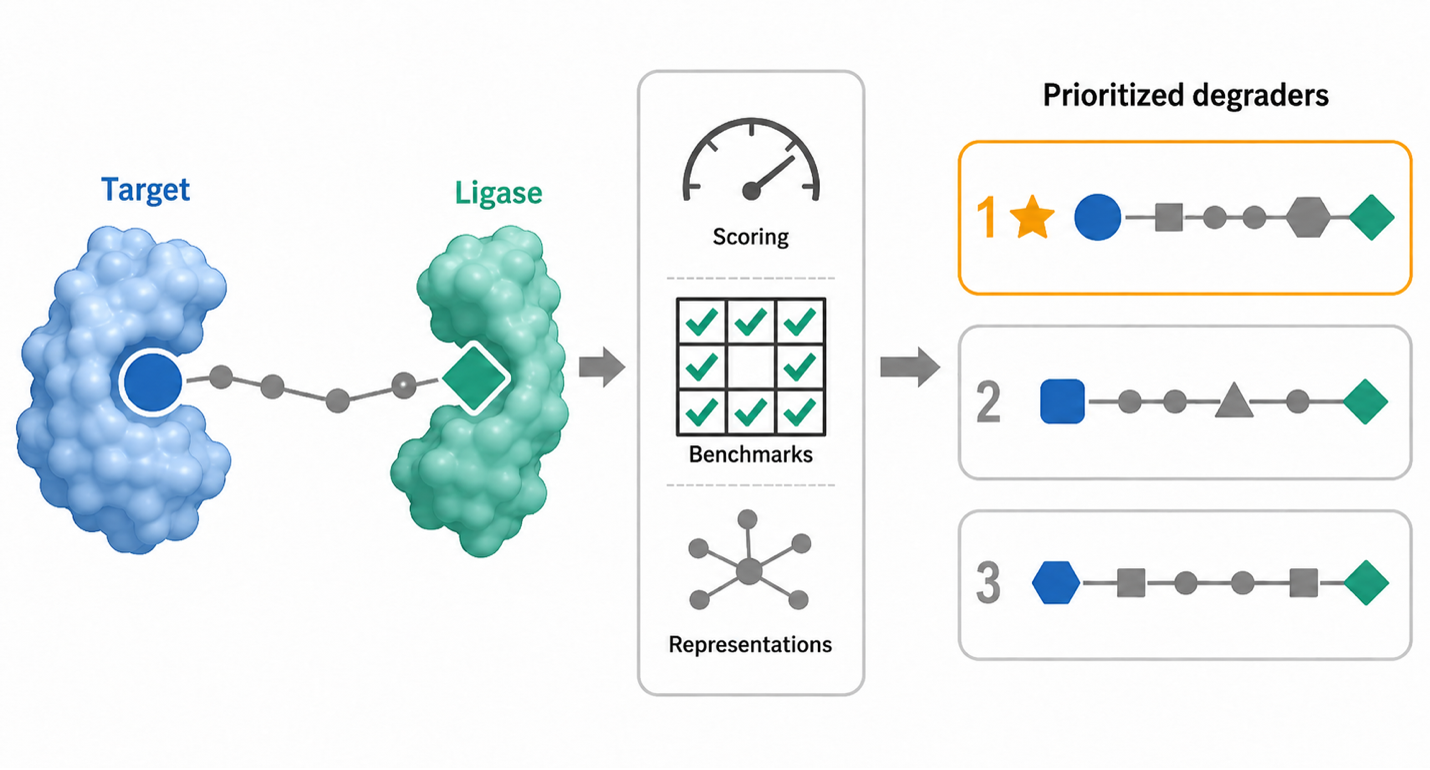
Workflow in context. PROTAC Builder sits in the middle of a broader workflow that starts with component discovery and continues into downstream structural review and prioritization. Figure from the Schürer Lab in silico PROTAC modeling perspective manuscript, used here as project-owned educational content.

Workflow case studies for PROTAC design

These case studies are conceptual workflow walkthroughs. They show how a user might start from a target-bound warhead, an E3 recruiter, a viral protein-ligand structure, or a batch/API use case, then move into PROTAC Builder for candidate assembly and downstream modeling. They are not claims that the assembled candidates are experimentally validated degraders.

Case study overview

Warhead-first workflow

Start from target-binding ligand evidence, inspect protein-bound warhead context in Warhead Hunter, identify candidate solvent-exposed attachment atoms, then return to PROTAC Builder for linker and recruiter selection.

Recruiter-first workflow

Start from E3 recruiter selection in E3 Ligandalyzer, compare recruiter scaffolds and bound poses, choose a plausible recruiter-side attachment vector, then use PROTAC Builder to pair the recruiter with a target warhead and linker panel.

Viral target workflow

Use V-LiSEMOD to inspect viral protein-ligand structures and solvent-exposed moieties, then bring candidate target-binding ideas into PROTAC Builder for component assembly and downstream evaluation.

Batch workflow

Use API Builder and API documentation to move from one interactive setup to reproducible, scripted candidate generation and downstream workflow handoff.

Warhead-first workflow

When to use this workflow

  • You know the protein of interest.
  • You still need a target-binding ligand or warhead.
  • You need plausible modification atoms before adding a linker.

Workflow steps

  1. Search or inspect ligand-bound structures in Warhead Hunter or RCSB Scout.
  2. Identify the bound ligand and target context that matter for your question.
  3. Inspect atom-level solvent exposure and 3D pose context.
  4. Avoid buried atoms that appear important for binding.
  5. Choose one or more candidate attachment atoms.
  6. Bring the warhead into PROTAC Builder.
  7. Pair it with an E3 recruiter and a linker panel.
  8. Export candidates into downstream modeling.

What to record

Target name
PDB ID or structure source
Ligand identity
Candidate attachment atoms
Solvent-exposure notes
Key binding interactions to preserve
Uncertainties or alternates
Warhead Hunter overview screenshot showing structure-guided warhead discovery, atom-level solvent exposure mapping, and launch paths.
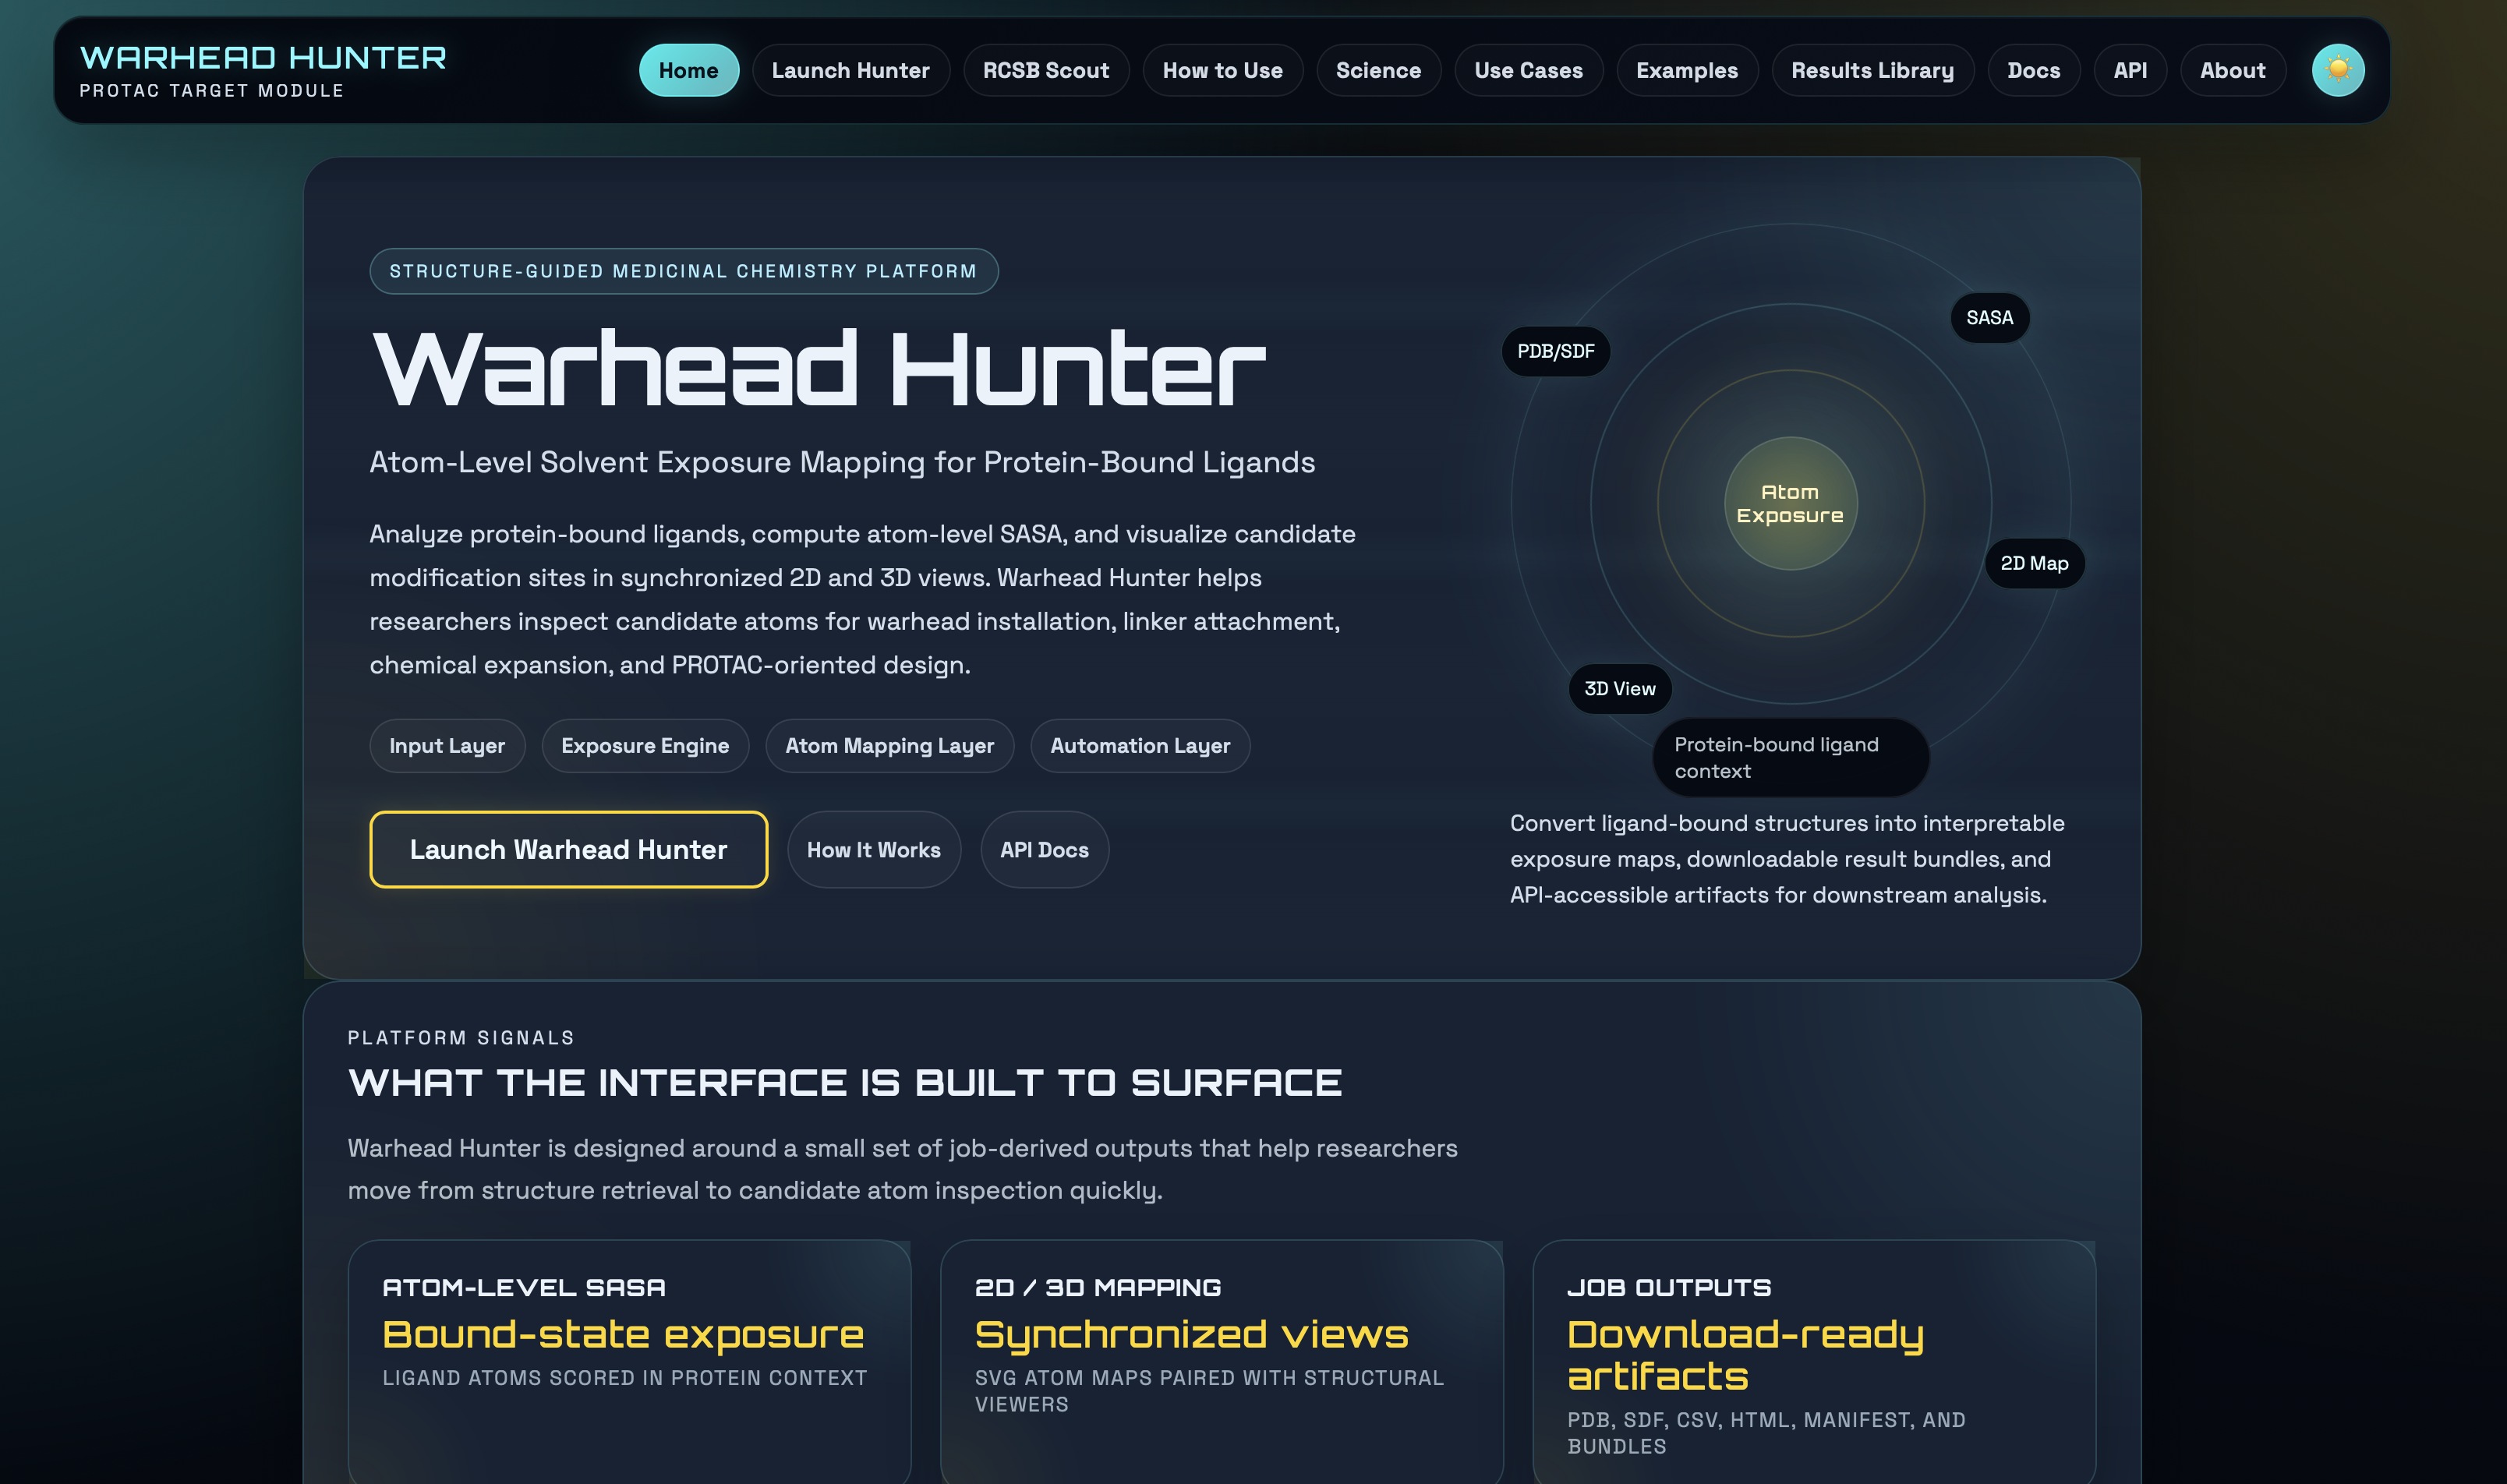
Warhead-first starting point. Warhead Hunter helps users inspect target-bound ligands, solvent exposure, and candidate modification sites before the warhead is handed into PROTAC Builder.

Recruiter-first workflow

E3 Ligandalyzer overview image showing recruiter-centered exploration for ligase-side design decisions.
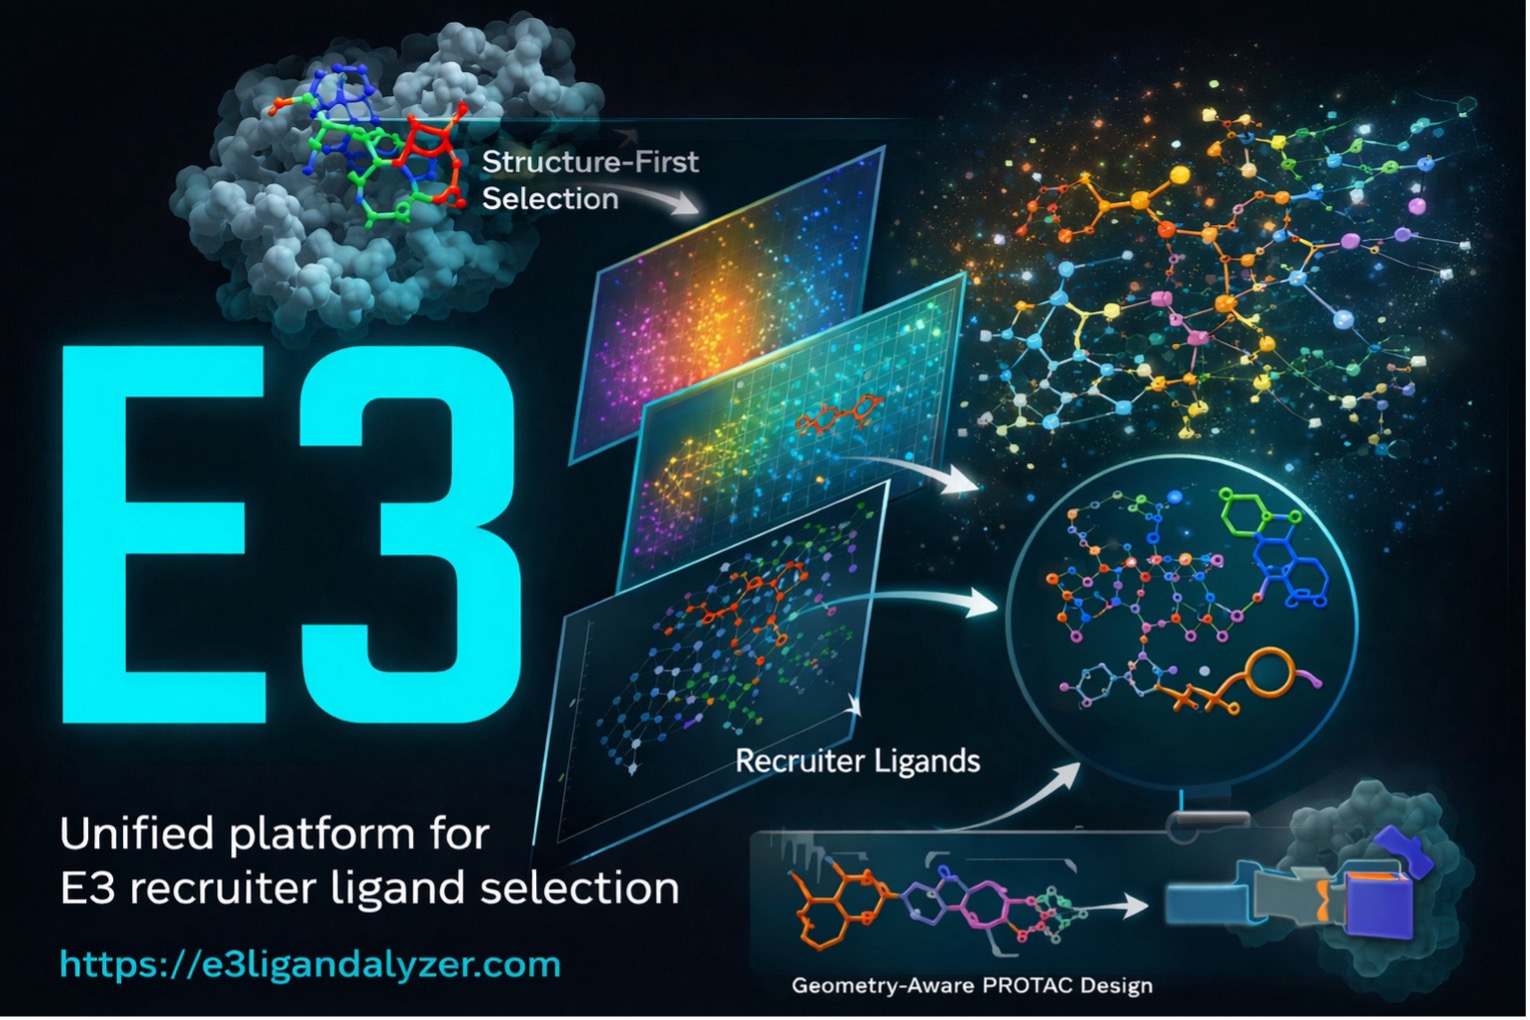
Recruiter-first starting point. E3 Ligandalyzer supports structure-first recruiter selection, scaffold comparison, and attachment-context review before the recruiter is paired with a warhead.

When to use this workflow

  • You are deciding which E3 ligase or recruiter to use.
  • You want to compare CRBN, VHL, or other recruiter chemotypes.
  • You need recruiter-bound pose, scaffold, or attachment-vector context.

Workflow steps

  1. Open E3 Ligandalyzer Explorer.
  2. Compare recruiter ligands by ligase, scaffold, and available property context.
  3. Inspect recruiter-bound structures.
  4. Check solvent exposure and plausible attachment atoms.
  5. Consider cell or tissue expression context where relevant.
  6. Reproduce the recruiter setup in PROTAC Builder.
  7. Pair it with a target warhead and linker panel.
  8. Use downstream modeling to evaluate ternary geometry.

What to record

E3 ligase
Recruiter ID or scaffold
Bound structure source
Recruiter-side attachment atom
Scaffold notes
Expression or context assumptions
Alternative recruiters to test

Viral target workflow

When to use this workflow

  • The protein of interest is viral.
  • You want viral protein-ligand structural context.
  • You need solvent-exposed moiety evidence before choosing a warhead attachment point.

Workflow steps

  1. Open V-LiSEMOD.
  2. Identify the viral target and relevant ligand-bound structures.
  3. Inspect solvent-exposed moieties or candidate warhead features.
  4. Select plausible target-binding ligand ideas.
  5. Document target context and candidate modification points.
  6. Bring the candidate warhead idea into PROTAC Builder.
  7. Choose an E3 recruiter and linker strategy.
  8. Evaluate bridgeability and downstream-modeling feasibility.

What to record

Viral target
Structure or source
Bound ligand or moiety
Candidate attachment point
Target-specific uncertainty
Proposed builder setup

Why this workflow is different

Viral-target workflows often begin upstream of the builder because the central uncertainty is still the target-bound ligand context rather than the final PROTAC assembly pattern.

That means the most important early decision is usually not which linker to enumerate, but whether the viral ligand evidence supports a plausible editable warhead at all.

Practical interpretation: the builder becomes useful after the viral-target ligand context is sufficiently clear to define a candidate warhead and one or more plausible attachment atoms.

Batch and API workflow

Workflow figure illustrating downstream computational and structured handoff concepts for PROTAC design and prioritization.
Batch-oriented handoff mindset. Once a workflow is understood interactively, the same logic can be carried into structured payloads, API calls, batch enumeration, and downstream evaluation.

When to use this workflow

  • You want to generate many candidate combinations.
  • You are moving from manual exploration to scripted workflows.
  • You need reproducible notebook, server, or pipeline integration.

Workflow steps

  1. Start from an interactive builder setup or from the examples page.
  2. Identify component IDs, linker choices, and attachment atoms.
  3. Use API Builder to prepare request payloads.
  4. Use API docs and OpenAPI schemas to script generation.
  5. Run batch workflows on a controlled set of candidates.
  6. Save inputs, outputs, IDs, query parameters, and dates.
  7. Send candidates to downstream modeling or descriptor workflows.
  8. Report assumptions and validation status explicitly.

What to record

Component IDs
Query parameters
Custom SMILES if used
Linker choices
API payload
Output files
Date or version context
Downstream workflow

From case study to builder setup

When the upstream logic is clear enough, some workflows can be turned into reproducible builder launch examples. These are implemented workflow starters, not biological claims:

Cross-case study checklist

Biological target is defined
Warhead or target-binding ligand is documented
Warhead attachment atom is plausible
E3 recruiter and ligase context are documented
Recruiter attachment atom is plausible
Linker panel varies length and properties
Component IDs or custom structures are saved
Builder setup is reproducible
Downstream modeling plan is defined
Experimental validation plan is defined
The workflow does not claim degradation without assay evidence

Common misinterpretations

Workflow example is not biological proof

These are workflow examples, not experimentally validated web-app results. Opening a builder preset does not mean the candidate is active.

Warhead or recruiter evidence is not enough alone

Warhead binding does not guarantee degradation, and recruiter binding does not guarantee a productive ternary complex.

Linker choice remains a central uncertainty

Even well-supported warheads and recruiters can fail if linker geometry, polarity, or bridgeability are wrong.

Throughput is not certainty

API generation and downstream modeling increase workflow scale and explanatory power, not biological certainty.

Connected resources

Internal Guide

Examples

Launch reproducible builder examples and quick-start workflows.

Open examples
Internal Guide

How to Build a PROTAC

Step-by-step practical guide from components to candidate setup.

Read build guide
Internal Guide

Warhead Discovery

Read the target-binding warhead guide and upstream Warhead Hunter workflow.

Open warhead guide
Internal Guide

Linker Design

Review bridgeability, linker classes, and geometry-aware linker thinking.

Open linker guide
Internal Guide

E3 Recruiter Discovery

Review recruiter-side structures, scaffolds, and attachment logic.

Open recruiter guide
Workflow Map

Component Hubs

See how warheads, linkers, and recruiters connect in one workflow map.

Open component hubs
Automation

API Docs

Review the public route surface and machine-readable workflow endpoints.

Open API docs
Handoff

Downstream Modeling

See what happens after assembly: geometry checks, modeling, and prioritization.

Open downstream modeling
Reporting

Benchmarking

Document modeling and reporting choices more responsibly.

Open benchmarking
External Tool

E3 Ligandalyzer Explorer

Explore recruiter-first discovery workflows.

Open explorer ↗
External Tool

V-LiSEMOD

Inspect viral protein-ligand structures before building a viral-target case.

Open V-LiSEMOD ↗

Ready to turn a workflow into a candidate setup?

The best next click depends on what is still uncertain in your workflow: target-binding context, recruiter choice, linker strategy, or reproducible generation. Once those pieces are clear enough, PROTAC Builder becomes the place to turn them into explicit candidate setups.

Final note: treat every assembled candidate as a design hypothesis that needs downstream modeling and experimental validation.